


Following our previous post, we are going to show how to protect legacy web applications with Syncope 3.0 Maggiore.
Let's recap the plan of the current post series:
- (first post) how to configure Syncope to protect a native OpenID Connect web application
- (this post) how to configure Syncope to protect a legacy web application
- how to manage which users are allowed to access which web application(s)
Each post provides a fully working demo based on Docker Compose, so if you like to follow, please stay prepared and get it ready on your laptop.
Getting and running the demo
First of all, you will need to grab the demo files. Secondly, you will have to add the following entry to your hosts file (depending on actual OS):
172.20.0.6 syncope-wa
Once all is set up, just cd into part2 and start via
docker compose up
Now it is time to relax and just let the magic happen: Docker will download the required images (database, Syncope components, native OpenID Connect and legacy web applications) and set everything up. When you start seeing log lines as follows:
org.apache.syncope.wa.starter.services.WAServiceRegistry : Loading application definitions
then it is time to back up and start giving the demo a try.
Exploring the demo
We are in the situation where a web application of ours is not capable to deal with the OpenID Connect protocol, maybe just because it is a bit too old for that, but we still want to protect access.
Our demo web application is so naive that it basically exposes three URLs:
/public/index.php- welcome page, public access/protected/index.php- reserved area, reporting information about the user logged in/publish/finish.php- exit page, to show after logging out
Point your favorite browser to http://localhost:8080/public/index.php

So far, so good. Now you can follow the provided link to enter the protected area.
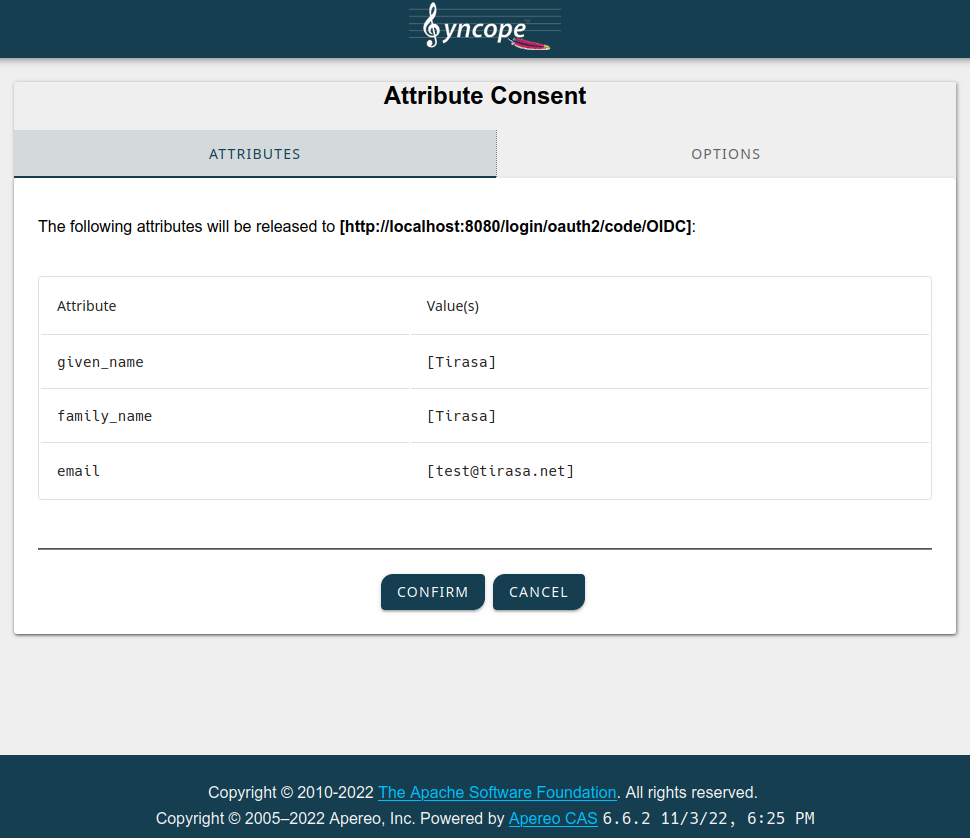
You will be redirected to the Syncope WA login form where you can insert the test credentials, tirasa as username and password as password.

After submitting the form, the consent screen will be shown:
When you confirm, the browser will be redirected back to the legacy web application, which will in turn show some details about the JWT values received by Syncope WA:
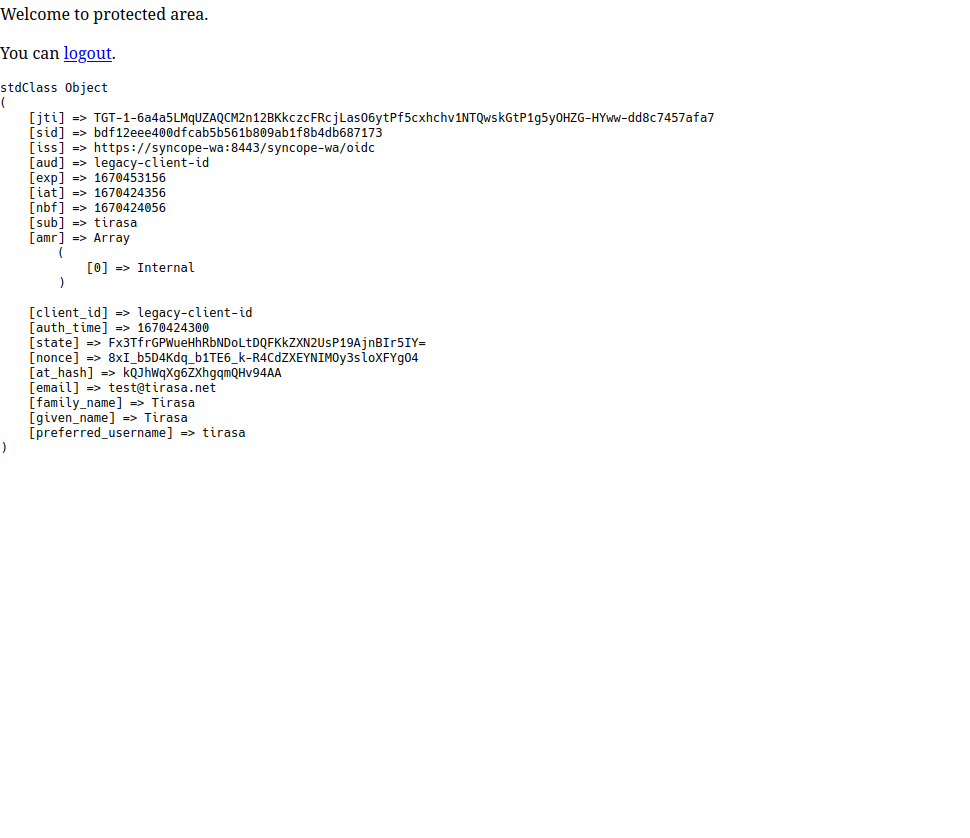
Finally, you can can follow the logout link and get to the last page:

A quick look under the hood
Ok it works, our legacy webapp is protected, but how can we administer all that? Let's sign up to the Admin Console.
Point your browser to http://localhost:28080/syncope-console/
and insert the super-admin credentials, admin as username and secret as password.
We need to look at two sides here:
- how SRA is configured to serve our legacy application
- how WA is configured to protect SRA, when it serves our legacy application
In order to better understand the settings shown below, please also consider that
- SRA is reachable at http://localhost:8080
- the legacy web application is based at http://legacy-app:80
WA configuration
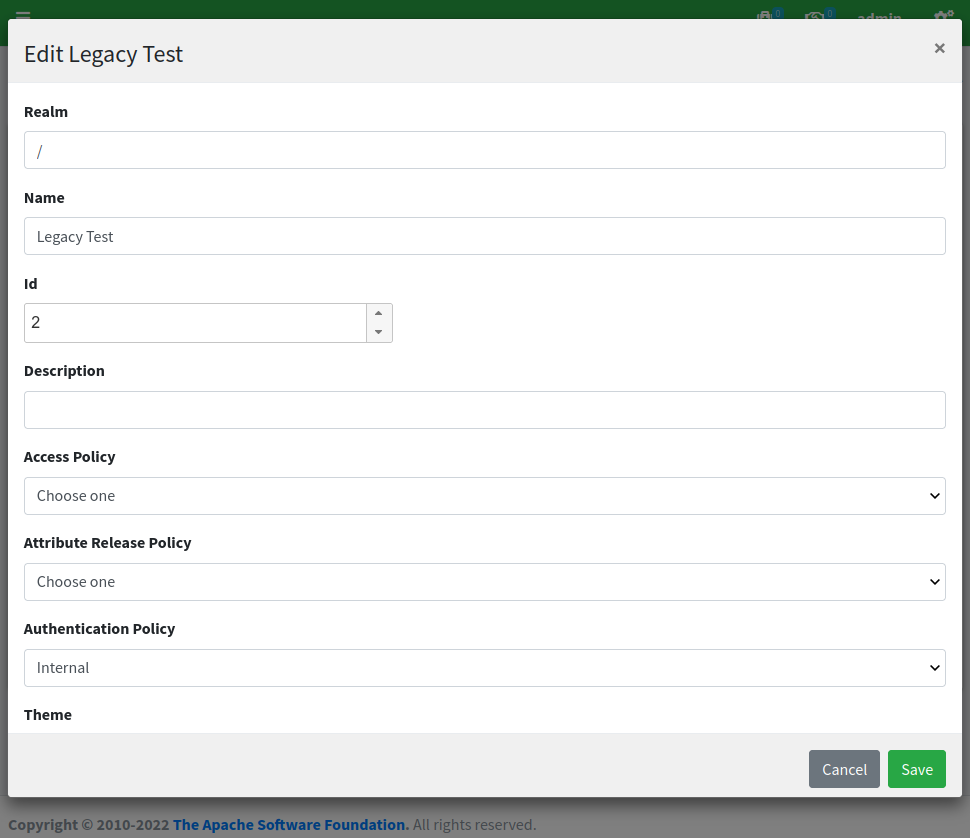
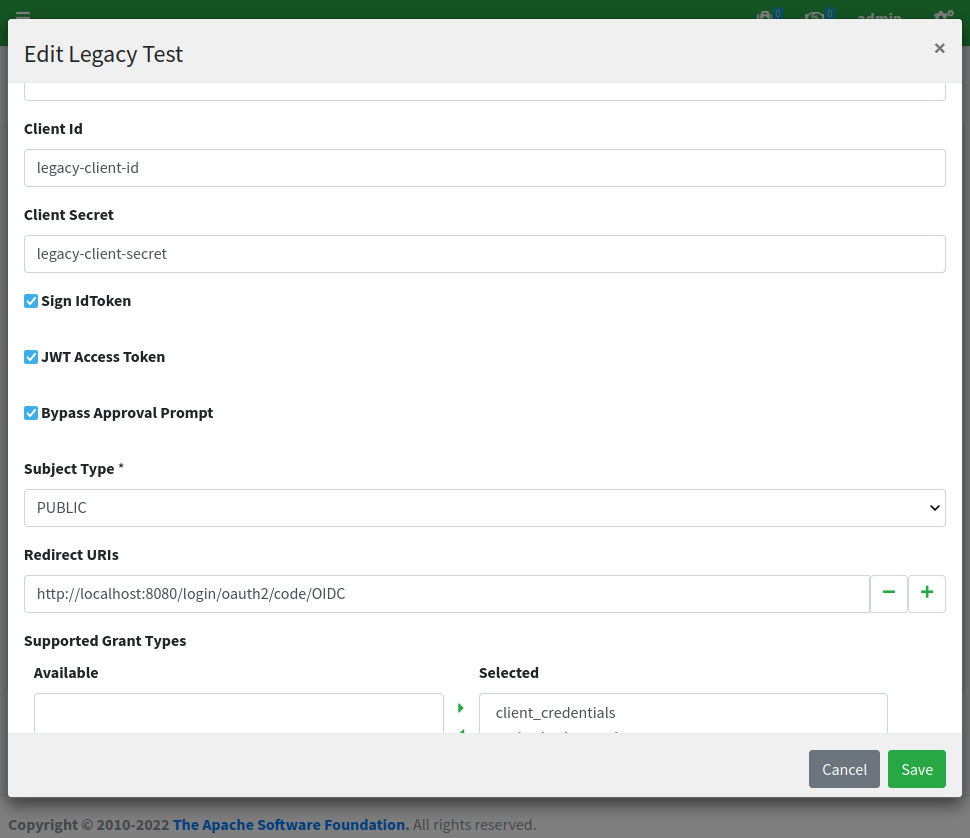
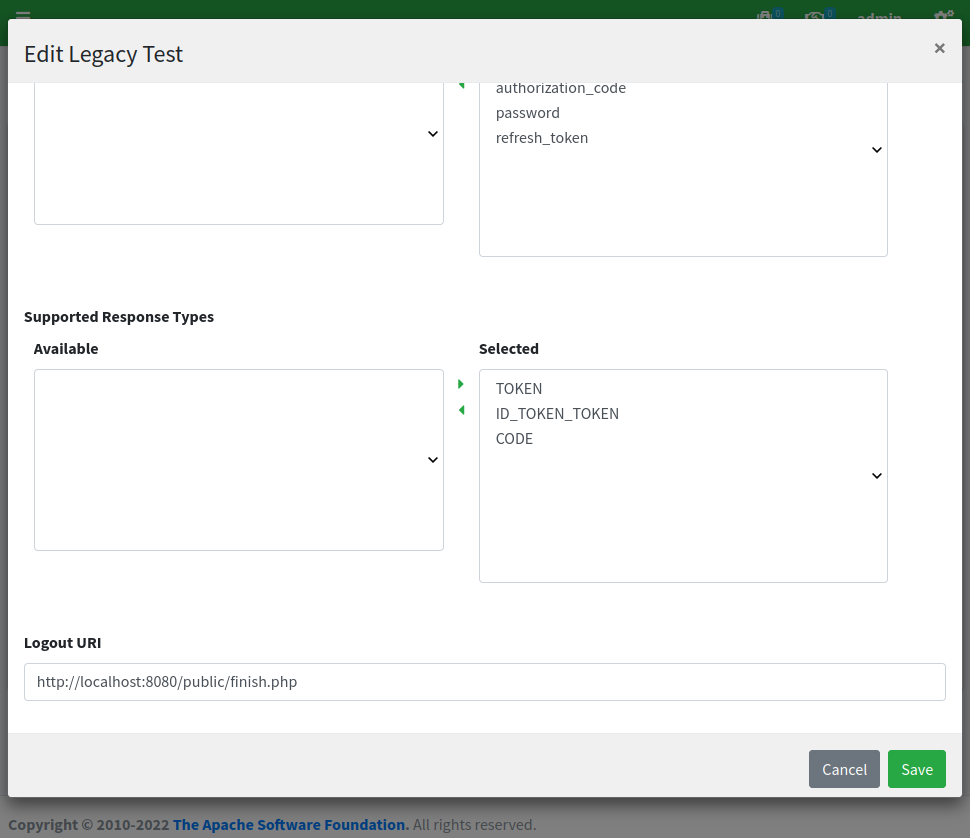
We can see that there is a new 'Legacy Test' OpenID Connect client application defined within the WA subsection:
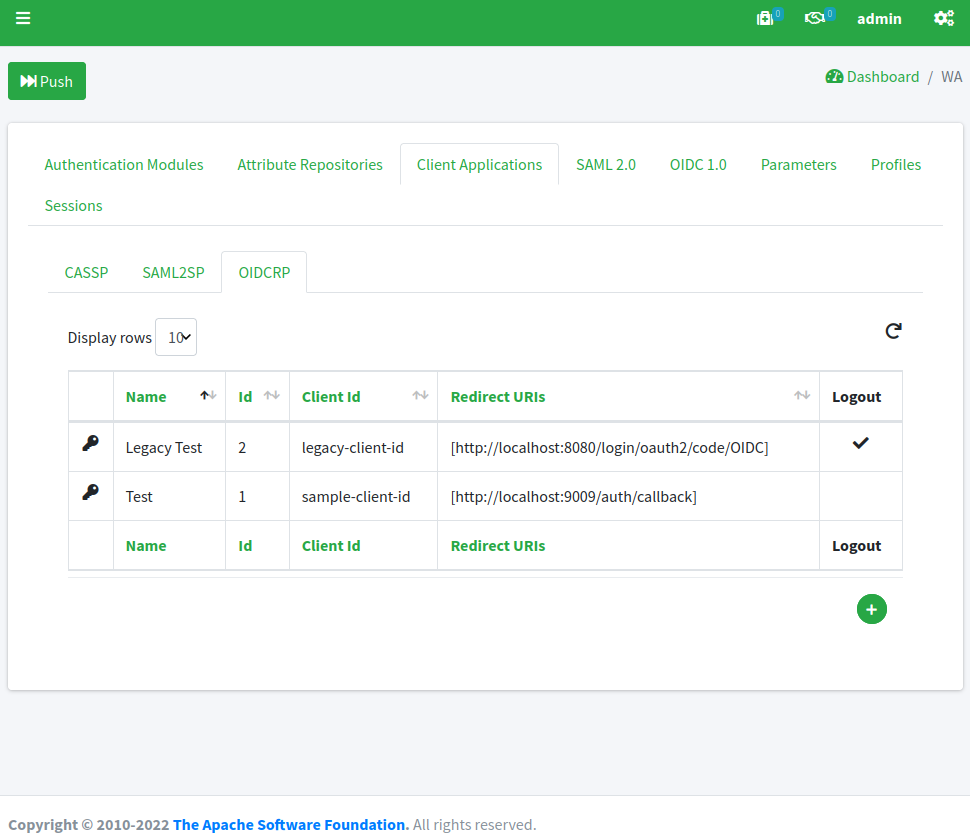
By clicking on the 'Legacy Test' row and selecting 'edit' from the popup menu, we can have a look at the configuration, which looks again similar to the 'Test' application we have been using for the first post, except for the fact that all referenced URLs are set for SRA:
SRA configuration
When we look under the SRA subsection, we can see the routes defined, e.g. how SRA is configured to respond when it receives HTTP requests.
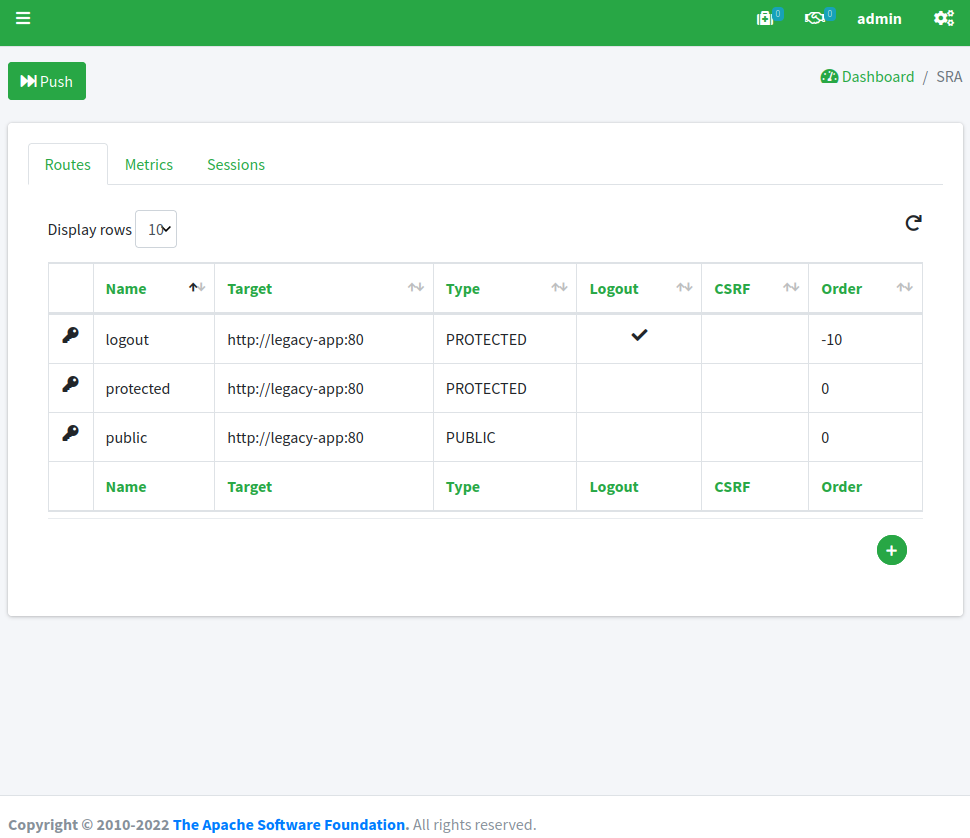
Unsurprisingly, there is one route for each area of our legacy web application; let's start with public:
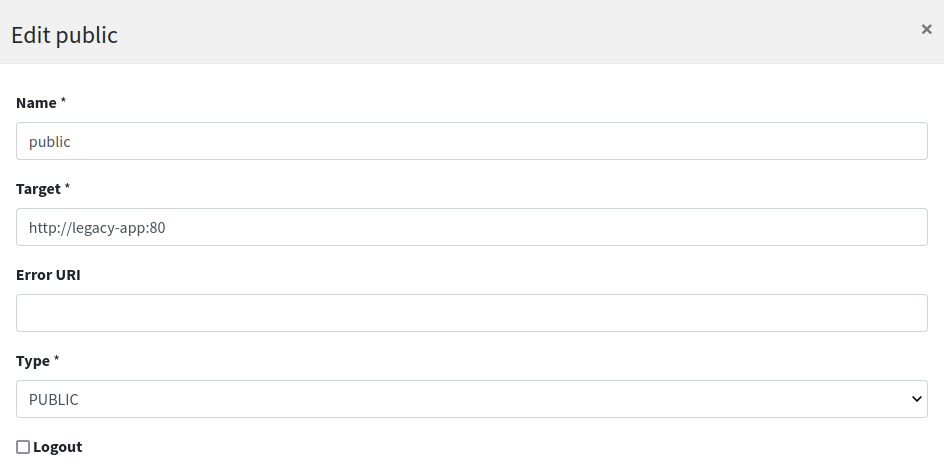
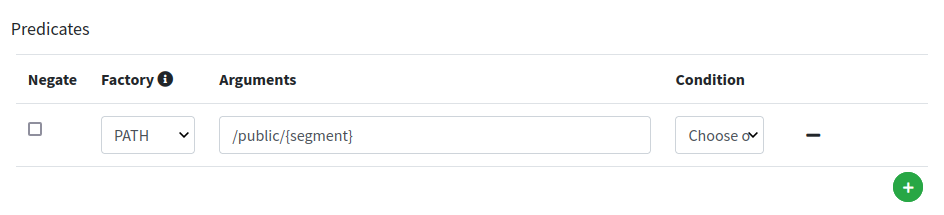
We can notice how the target for this route is set to http://legacy-app:80 - which means that SRA will contact such URL to fetch the content to serve - and that the condition to match this route is for the caller to request for /public/{segment}, hence for example /public/index.php as reported above.
Long story short: requesting http://localhost:8080/public/index.php will trigger SRA to internally fetch http://legacy-app:80/public/index.php and serve it back to the caller.
Let's have a look now at the protected route:
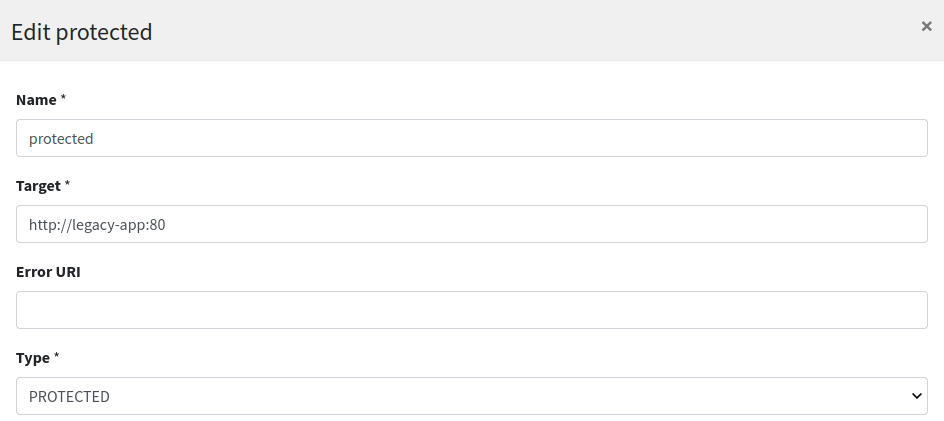
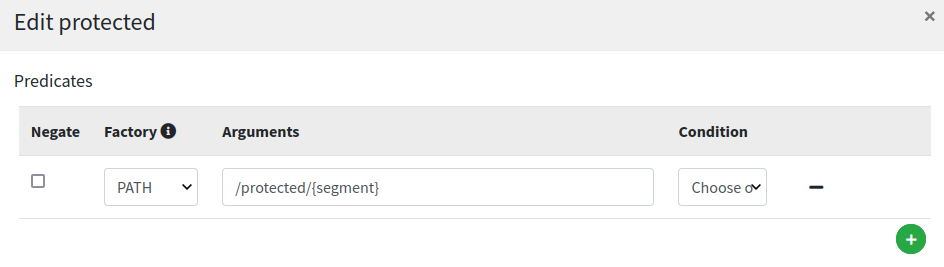
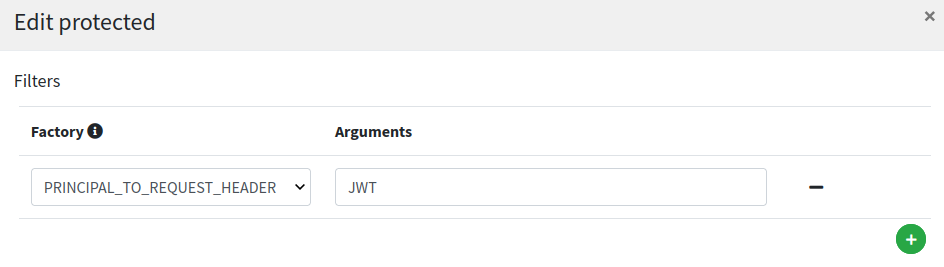
This looks very similar to public route (except for /protected/{segment} path, naturally) but with one important addition, the PRINCIPAL_TO_REQUEST_HEADER filter configured: with this setting on, the authenticated principal is dynamically added to downstream request’s JWT header; this is the mean to make aware our legacy web application about the profile details of the logged in user.
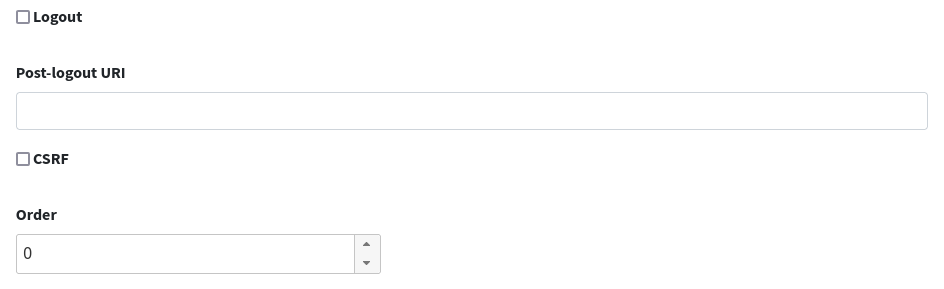
Finally, the logout route:
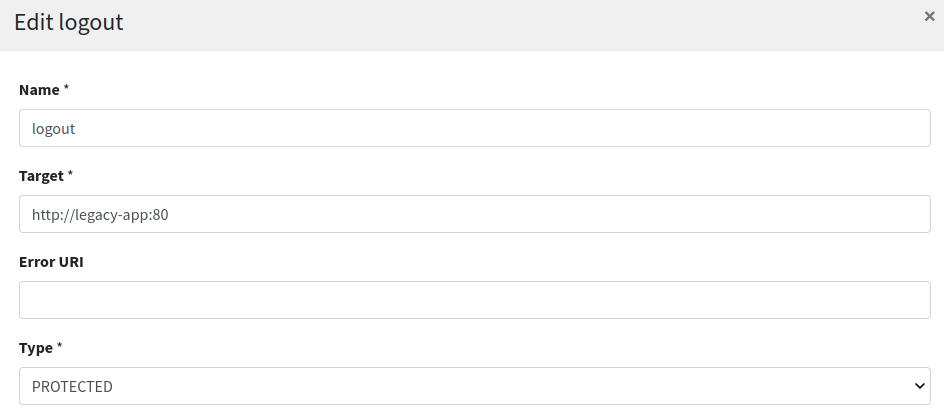
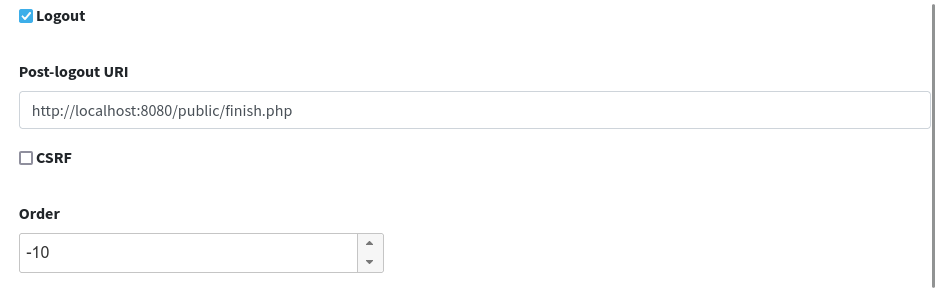
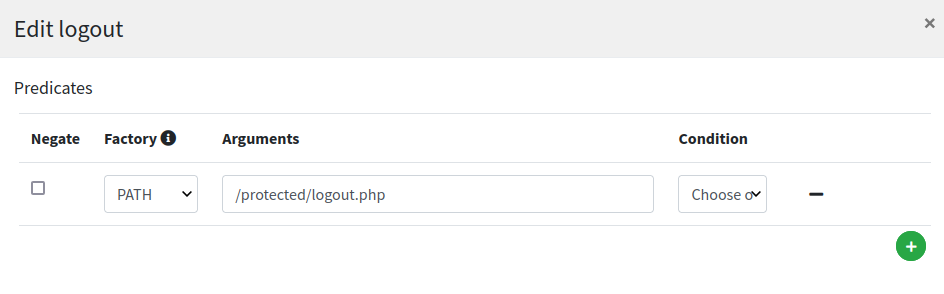
Most relevant setting here is the value for 'Post-logout URI' which needs to match what was provided as 'Logout URI' in the WA client application configuration as shown above.
How the demo works
- by visiting http://localhost:8080/public/index.php the requester is actually getting to the legacy web application based at http://legacy-app:80
- when clicking the provided link to enter the protected area http://localhost:8080/protected/index.php SRA recognizes it belongs to a protected route and redirects to the configured provider, WA
- WA checks that the request is coming from a configured client application and shows the login form
- after submit, WA checks the provided credentials against the existing internal users
- WA fetches the configured attributes from successful authentication and asks for confirmation to send back to requesting application
- SRA completes the OpenID Connect interaction, extracts the authenticated principal and forwards this information downstream to legacy application as HTTP request header
- legacy application takes the provided information and shows it as dynamic page content, which SRA serves back to the original requester
- by clicking on the logout link http://localhost:8080/protected/logout.php SRA will initiate the OpenID Connect logout process and finally bring back user to the final landing page
Wrapping up
We have shown how to quickly configure some Syncope components to implement the common use case scenario where access to a legacy web application needs to be protected, and the web application itself requires to access to the logged user profile.
In the next part we will add some Identity Management and Access Control spicies on top it, by managing which users are allowed to access which web application(s).
Stay tuned!
 Yes, Excellent!
