


SCIM is a standard for automating the exchange of user identity information between identity domains.
SCIM (System for Cross-domain Identity Management) communicates user identity data between identity providers (such as companies with multiple individual users) and service providers requiring user identity information (such as enterprise SaaS apps).
Syncope exposes a fully compliant SCIM 2.0 RESTful interface available under /scim, it translates the incoming/outgoing payloads from/to SCIM formats to/from Syncope standard formats, and it is developed as an extension.
The idea of this blog post is to turn LDAP Directory into a SCIM 2.0 provider by adding OpenLDAP to Syncope, defining the scheme for inetOrgPerson, providing the mapping and then configuring SCIM accordingly. For implementing this in Syncope, the steps are as follows:
Create a project from maven archetype
First it is to start with a simple embedded Syncope project from archetype:
$ mvn archetype:generate \
    -DarchetypeGroupId=org.apache.syncope \
    -DarchetypeArtifactId=syncope-archetype \
    -DarchetypeRepository=http://repo1.maven.org/maven2 \
    -DarchetypeVersion=2.1.4
By default, the embedded mode is populated with example data. If you prefer to work in an empty Syncope project, this can be done by running the following commands:
$ cd [CREATED_PROJECT_FOLDER]
$ cp core/src/main/resources/domains/MasterContent.xml \
     core/src/test/resources/domains/MasterContent.xml
Then build it with "all" profile in order to load SCIM extension:
$ cd [CREATED_PROJECT_FOLDER]
$ mvn -P all clean install && cd enduser && mvn -P embedded,all
Now, from your browser, login to Syncope Console at http://localhost:9080/syncope-console/
using the default "admin" / "password" credentials.
Add OpenLDAP to Syncope
Here we need to:
- Configure LDAP connector instance; as an important note, we are going to work with inetOrgPerson object class thus, in case you do not have an LDAP connector already configured, it is needed to add a new one with the required values depending on your actual OpenLDAP instance.
- Configure the OpenLDAP External Resource.
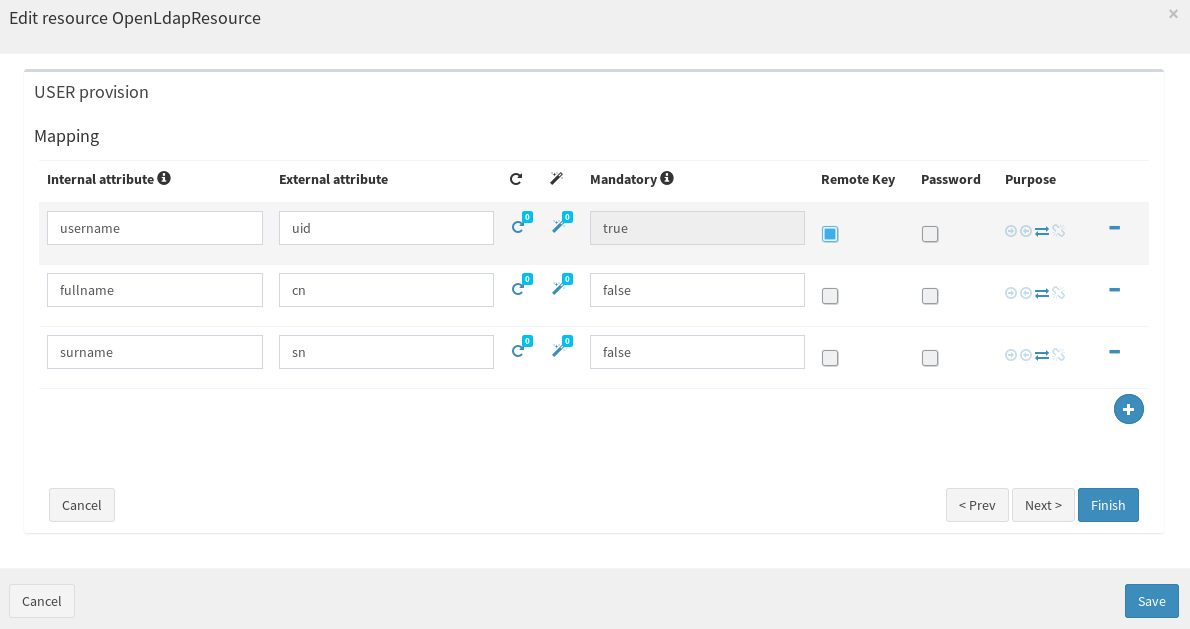
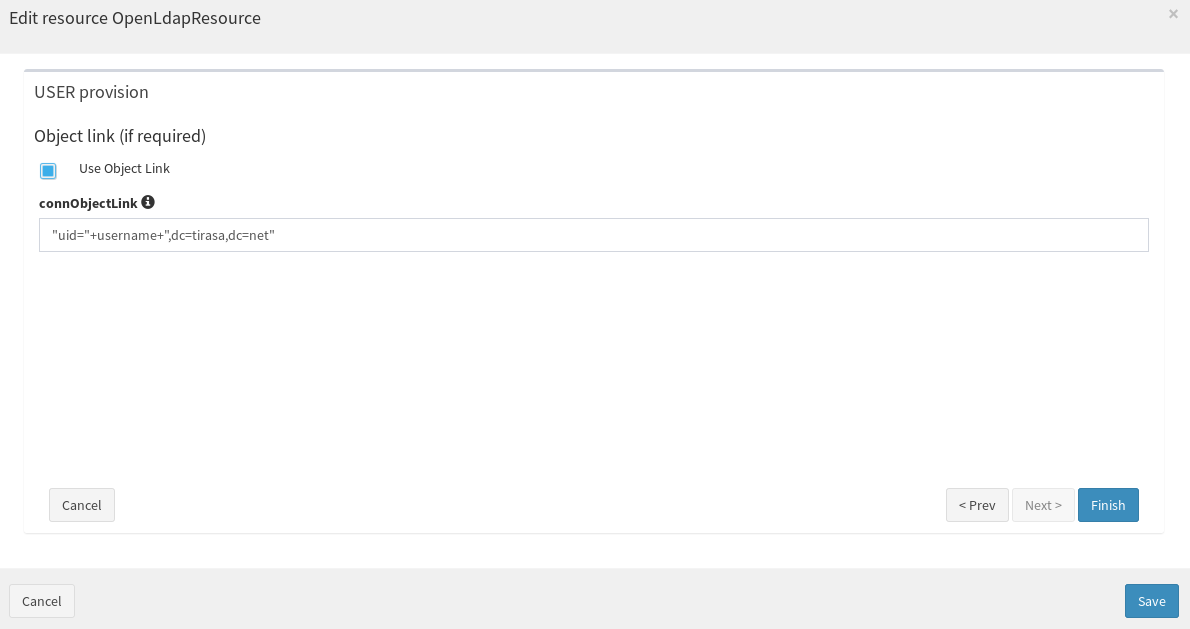
- Configure USER mapping between Syncope user attributes and OpenLDAP user attributes: here make sure to map all mandatory LDAP attributes; please notice that, since in case you are working with a clean Syncope project, some schemas (as fullname and surname, for example) might need to be created.
Configure SCIM
Go to Extensions --> SCIM from the left panel, and then choose User tab, here you need to map between Syncope user attributes and SCIM user attributes.
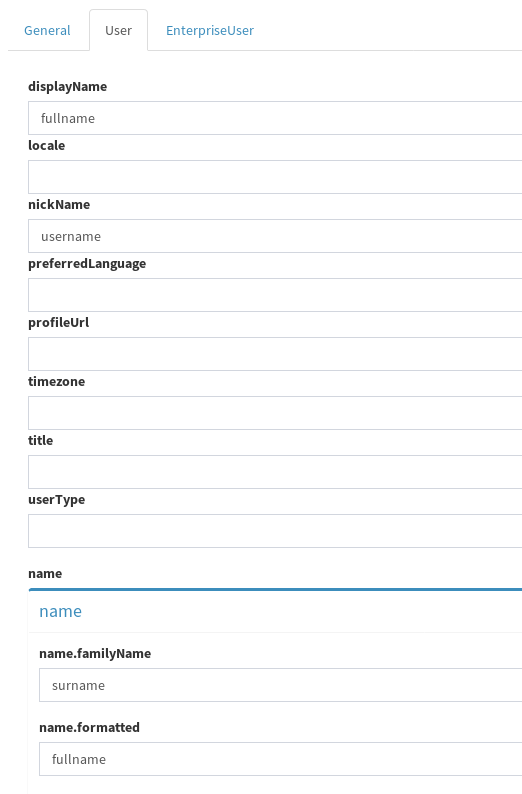
More attributes can be mapped, but for our purpose it is necessary to add the mapping with Syncope attributes that we already used to map with the attributes of OpenLDAP.
Provision a user dynamically to OpenLDAP resource
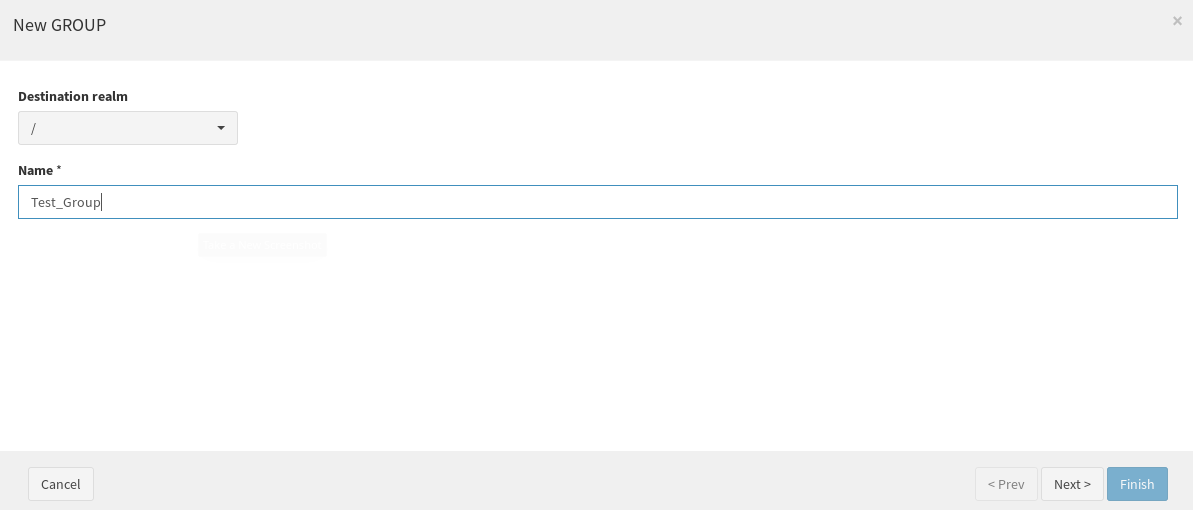
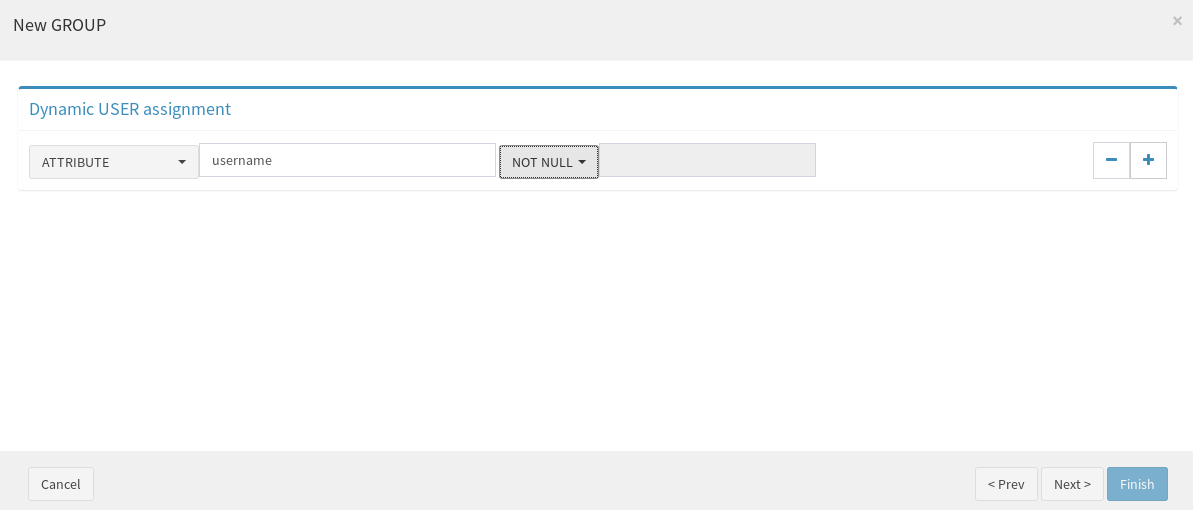
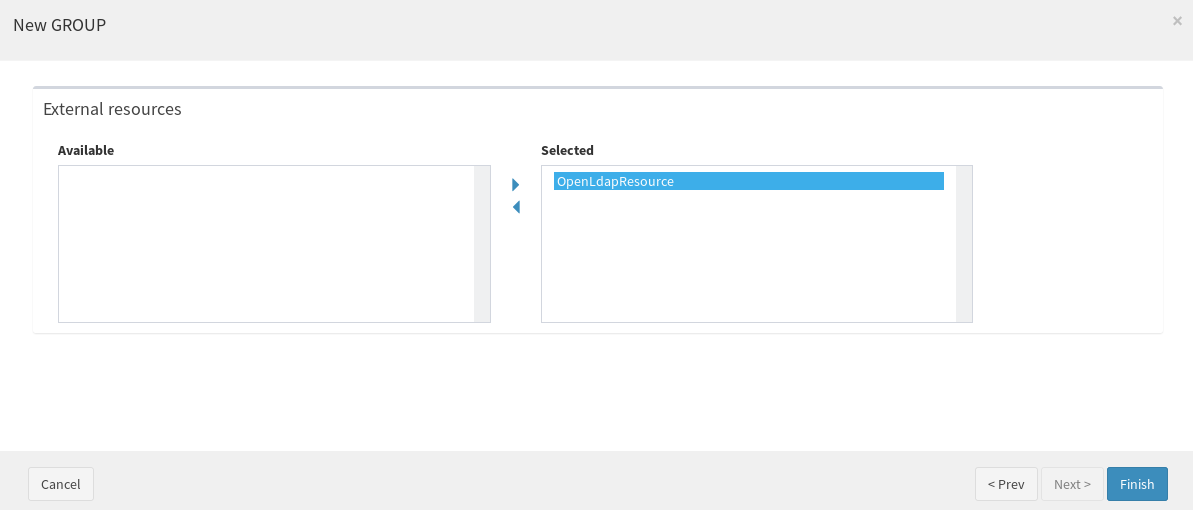
While creating a user from SCIM, it is needed to provision the user dynamically to OpenLDAP resource. One of the easiest solution is by creating a Group with a “Dynaamic USER assignment”, with a condition that satisfies the case, as follows (users will always feature non-null username values).
After following the steps above, the communication to OpenLDAP by using SCIM v2 REST APIs is fully set up.
The SCIM endpoint is http://localhost:9080/syncope/scim/v2, some examples are shown below:
- Create a user request:
POST http://localhost:9080/syncope/scim/v2/Users
Accept: application/scim+json Content-Type: application/scim+json { "schemas":["urn:ietf:params:scim:schemas:core:2.0:User"], "name":{ "formatted":"Dima Ayash", "familyName":"Ayash" }, "displayName":"Dima Ayash", "nickName":"DimaAy" } - Get all users request:
GET http://localhost:9080/syncope/scim/v2/Users
- Get a specific user:
GET http://localhost:9080/syncope/scim/v2/Users/{id}
- Delete a specific user:
DELETE http://localhost:9080/syncope/scim/v2/Users/{id}
Now that SCIM 2.0 through OpenLDAP is working via Syncope, it's time to instruct Azure Active Directory to provision via SCIM by following the steps mentioned in the official docs.
 Good
Good
