Small example on how to federate OpenAM with Wordpress via SAML 2.0.
In this small example, we will explore how to federate OpenAM credentials with Wordpress. As you can image, we will use OpenAM as SAML 2.0 identity provider and Wordpress as Service Provider, thus providing effective Single SignOn.
The scenario is very intuitive: we have a Wordpress instance that we want to manage, and at the same time we have an OpenAM installation that acts as identity provider. We don't want unlinked accounts in different systems: for this reason we will benefits of the concept of federation.
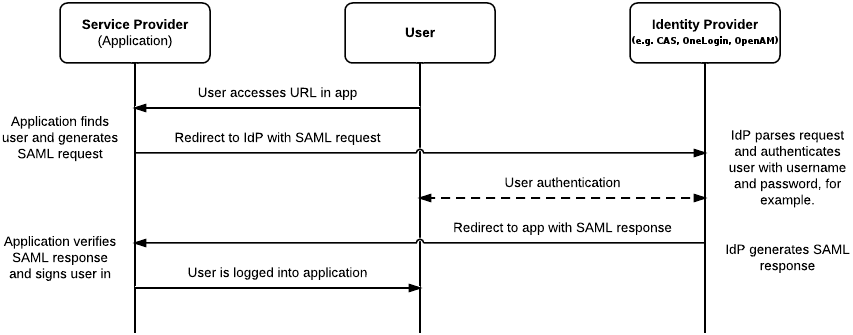
The image below synthesizes the whole flow. First of all, an User accesses Wordpress login page: the request is redirected immediately to the Identity Provider, with a SAML request. The identity provider elaborates the SAML request, and performs the User Authentication using a form. Once authenticated, the identity provider redirects a SAML response to the services provider. In our case the Wordpress plugin elaborates the request: if the user doesn't exist, it will be internally created. At the end of this phase, user is logged in.
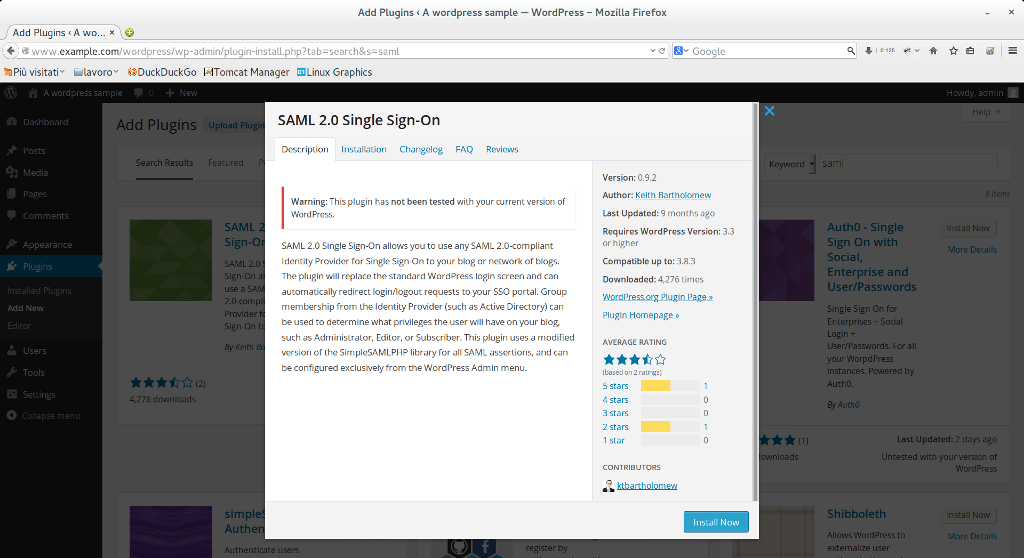
In order to proceed with this example, we will use an interesting plugin called SAML 2.0 Single Sign-On. You can download it from Wordpress website, or directly from the plugin page of Wordpress admin console. We will explore it later.
1) Install OpenAM
In our example we will use an embedded instance of openDJ. Moreover, we are using as main host www.example.com, resolved locally, in order to perform Single SignOn: the same host must be chosen during Wordpress installation.
Other steps, like subject creation, can be performed in this early stage. Remember that you have to create also a group, that will be mapped with Wordpress roles.
2) Install Wordpress
After installation, in the plugins page, install SAML 2.0 Single Sign-On (you can search SAML string): we will configure it after.
3) Now we have to configure OpenAM. First of all, we have to create a Circle Of Trust (COT). In order to do this, in the OpenAM home page click on Federation and after click new in the COT table.
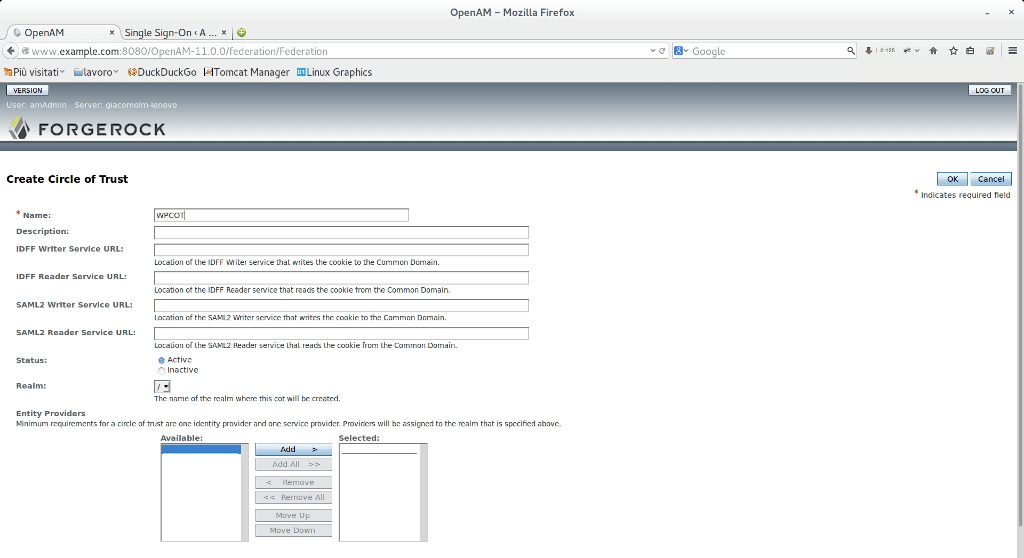
In this example we are referring to top realm (/), but you can refer to another one.
4) Now go back to OpenAM home page. Click on “Create hosted identity provider” on the common tasks tab. Also in this case choose your realm (in our case \ ) Use the “Test” signing key.
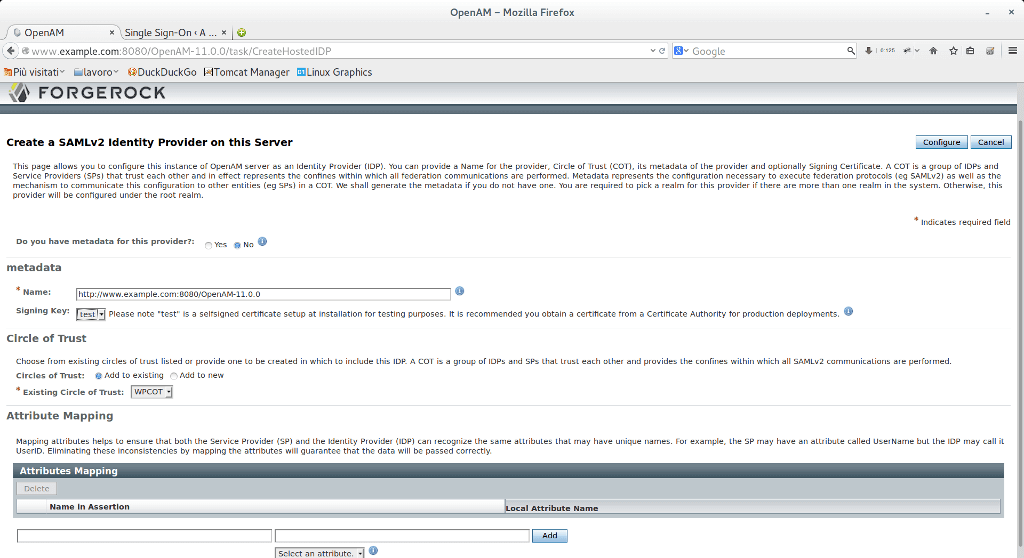
At the end click on Configure button. In this way we have created the hosted identity provider.
5) Before creating the service provider, go back to Wordpress. Go under Settings and click on Single SignOn. In this page you will find your SP SAML information. For the moment copy the highlighted link
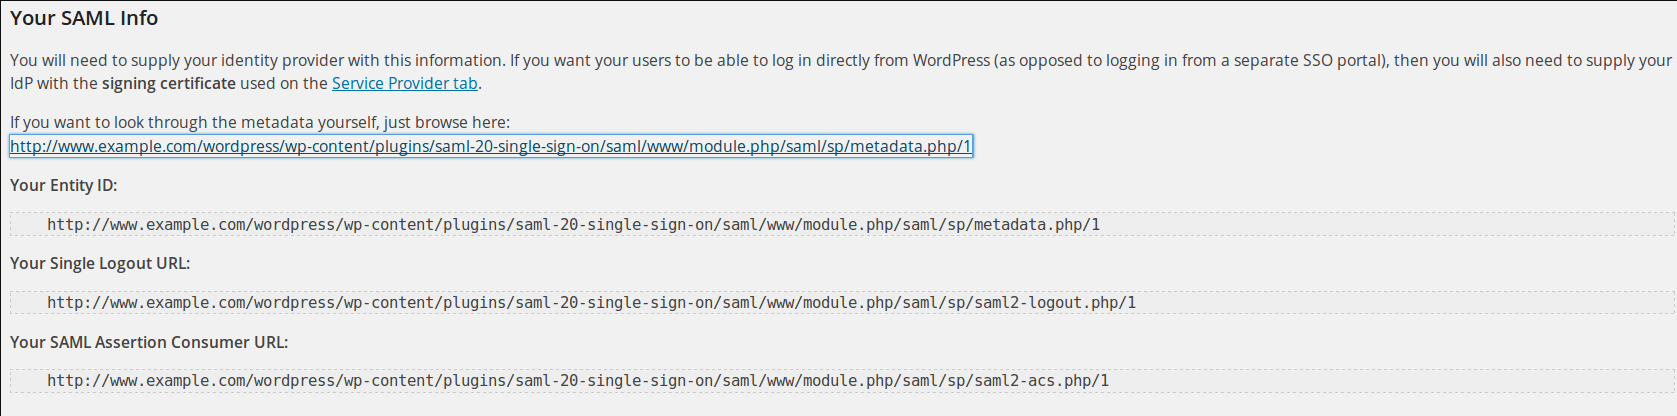
The linked page contains the Service Provider metadata, that will be used by the IDP during authentication.
6) Now, go back in OpenAM and click on the Common Tasks Tab. Then, click on “Register Remote Service Provider”. Select the your relam (in our case “/”): Choose URL radio. Add the URL that was copied from the Wordpress plugin. The circle of trust must be the same as the one that was created in the previous steps.

If the meta-data URL is correct, OpenAM will show a popup windows confirming your configuration.
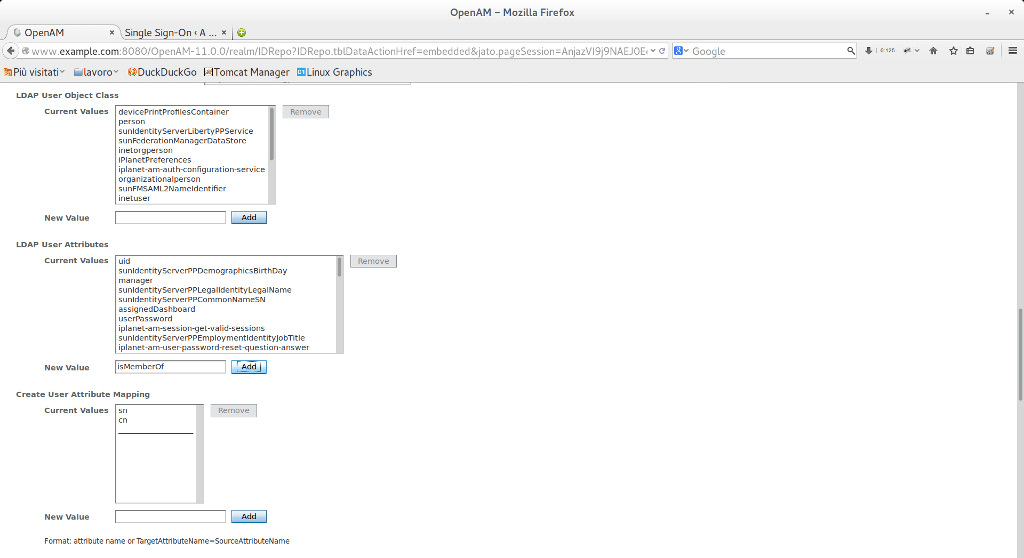
7) Before configuring the remote service provider, we have to add an existing attribute in our datastore. This attribute is needed in order to map group attribute with Worpdpress roles. In our case, OpenDJ offers the isMemberOf attribute. All this information will be passed during SAML authentication. In order to do include this attribute, go under Access Control → <your realm> → Datastore → Embedded . Find the LDAP user attributes and add the 'isMemberOf' Attribute
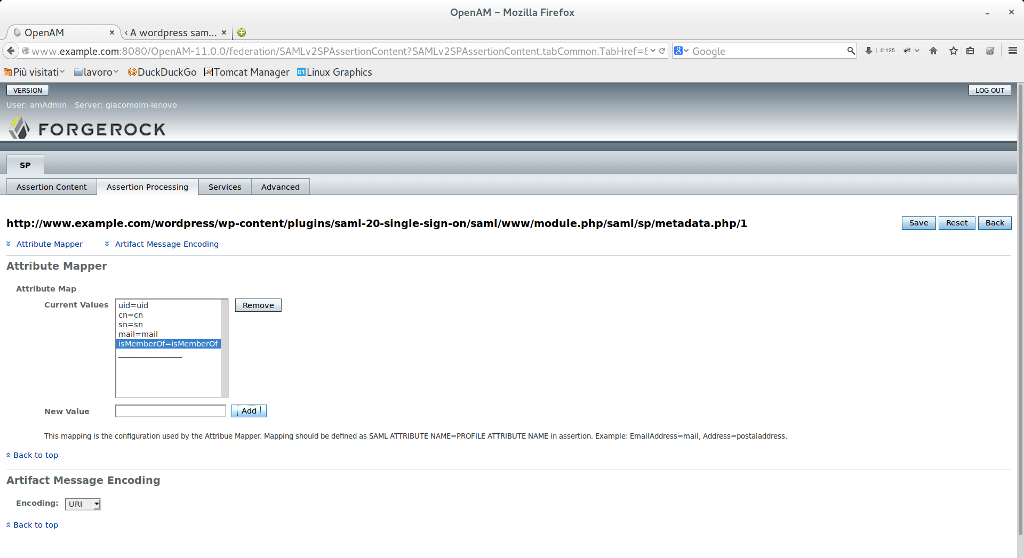
8) Now we can proceed with remote service provider configuration. This steps consists of specification of attribute mapping. The listed attribute will be included in the SAML response and will be used by the Service Provider.
9) Now we are able to set the Wordpress plugin, In order to do this, we need some extra information that we can check by visiting our IdP configuration. In my case this is the link:
http://www.example.com:8080/OpenAM-11.0.0/saml2/jsp/exportmetadata.jsp
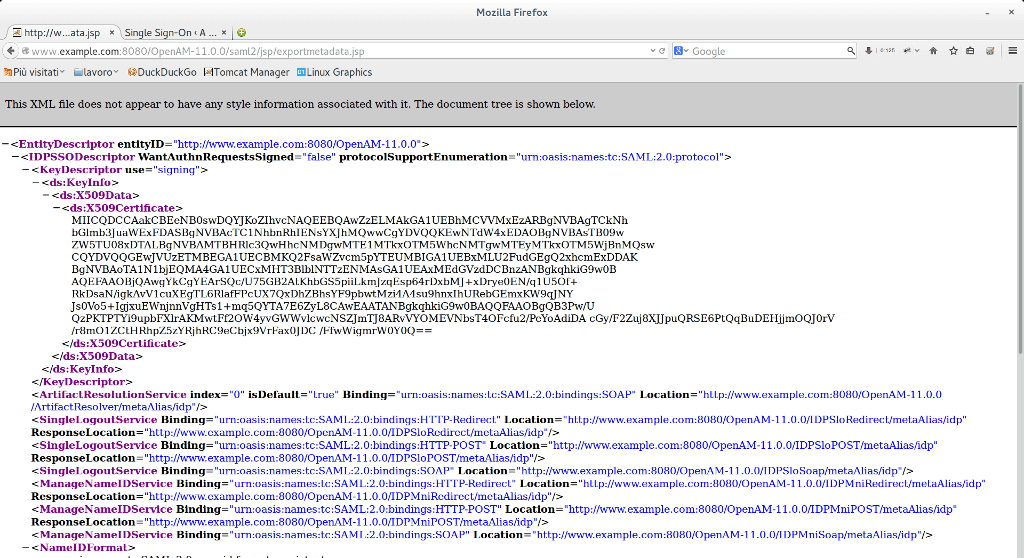
This page contains all the meta-data related to Identity Provider. Keep only the link in your clipboard.
10) Open Wordpress plugin configuration Page. Go under Identity provider and paste the link in the Url Metadata textfield. Now click on fetch meta-data
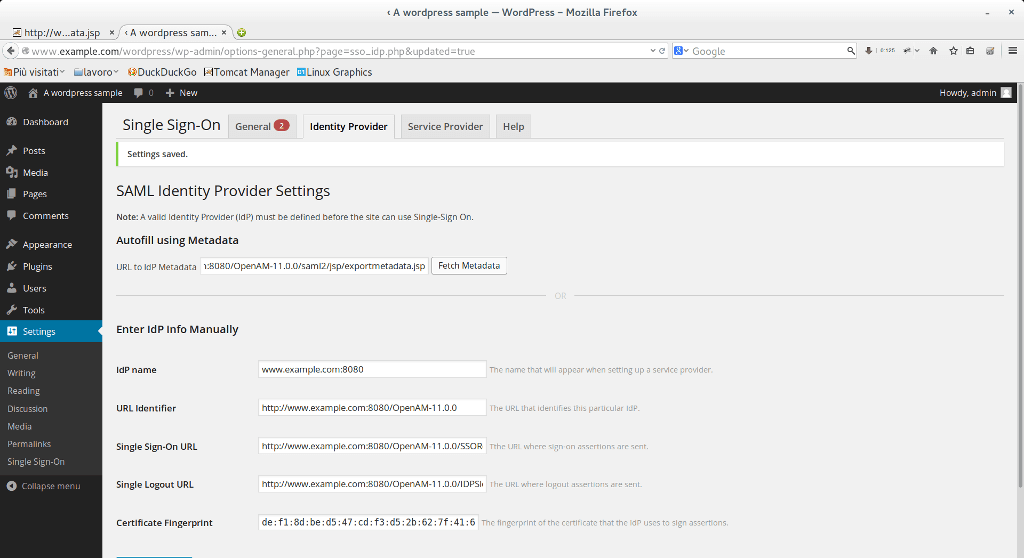
In this way we filled automatically the service provider info.
11) Now we can fill Service Provider information. Don't forget to generate the key

Now fill service provider information depending on your IdP attribute mapper (see step 8). In my case I have this configuration.
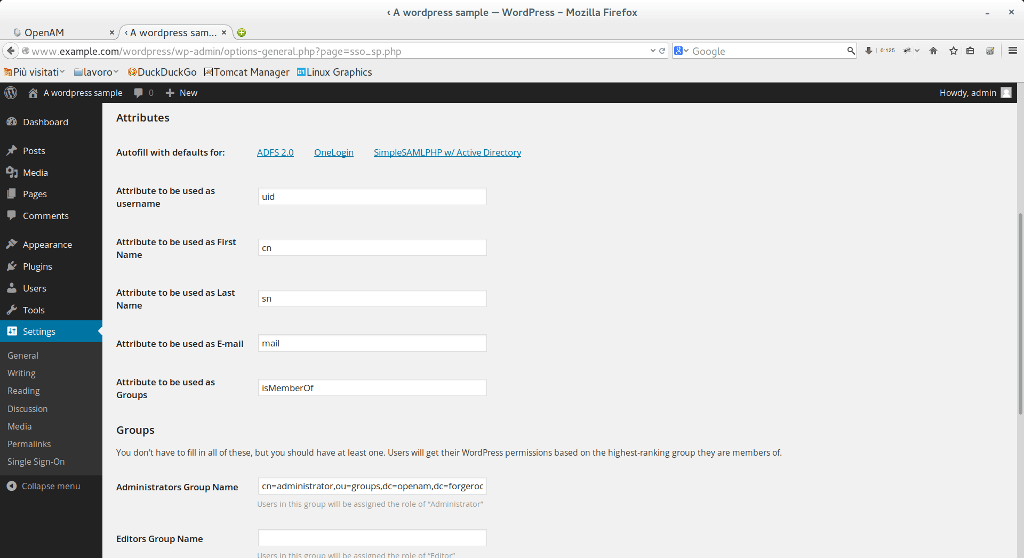
In my OpenAM installation I have only the administrator group, that I mapped with the Administrator group name.
12) Now open your favorite browser (better in a private session) and visit wordpress login: http://www.example.com/wordpress/wp-login.php. You will be redirected to OpenAM login page
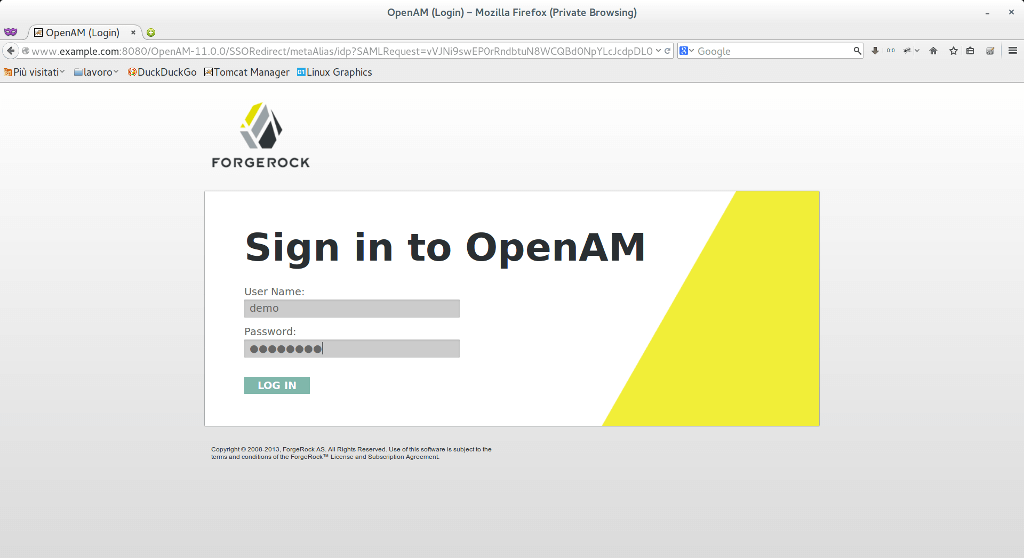
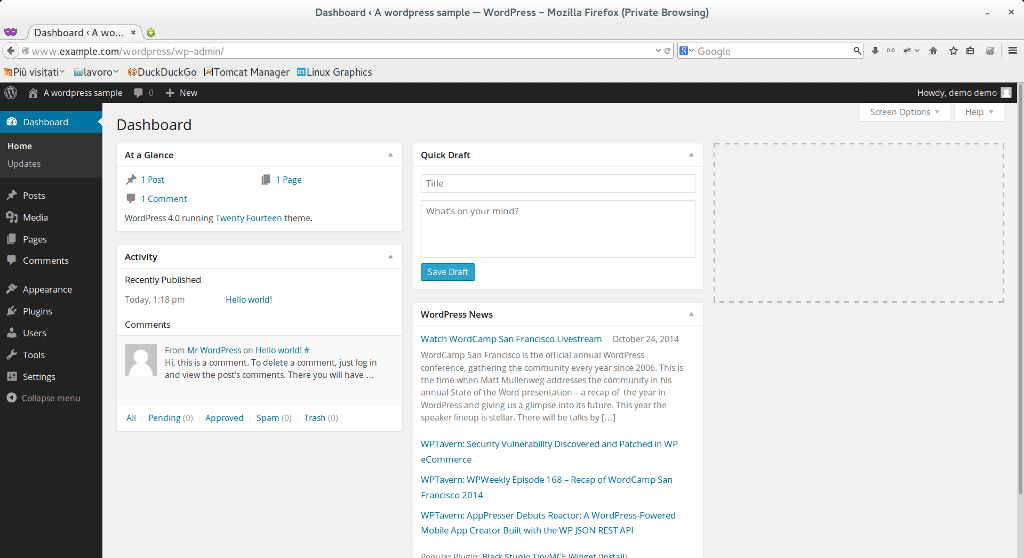
I used demo/changeit, an user belonging to administrator group. After click on login, you will have:
Troubleshooting:
You may have problems in accessing Wordpress. This is mainly due to two aspects: you possibly haven't specified any group for your OpenAM users or you haven't correctly set the attribute mapping. Moreover you might have to specify the mail attribute for OpenAM users: if you want to access Wordpress with your OpenAM account, you need to specify your email address.
 Average


